Blog

6 questions you should always ask before buying fish

crispy_fishIf you have felt apprehensive upon approaching the fish counter—whether you don’t have much experience cooking fish or you just made eye contact with a finned fellow lying there on the ice—you’re not alone.

“I would say [people feel] terrified,” Mark Usewicz, one of the founders of the Brooklyn seafood shop Mermaid’s Garden, told me, for a few reasons:

They’re worried about their house smelling fishy, or they don’t know what to expect from a certain fish. Or they just feel uninformed about what cooking seafood entails beyond the occasional filet of salmon or halibut.

The first steps to bolstering your fish-counter courage? Find a fishmonger you trust and “Ask your fishmonger questions,” Mark said. These are the ones you should start with.

What’s in season?

salmon

Photo by James Ransom

“A lot of people don’t realize that most fish have seasons,” Mark said. Right now, for example, if you live in the Northeast, you should look into monkfish and skate, which aren’t as good once the water warms up.

This might mean that you have to adapt a recipe—but luckily, most recipes adapt easily to other varieties of fish. This comes with the added benefit of having an opportunity to try a lot of different kinds of fish. “We don’t sell farmed salmon, so we only have salmon from late spring to early fall,” Mark said. But there are lots of seasonal, responsibly farmed fish that make great stand-ins for salmon, like red rainbow trout and arctic char. “They’re both in the salmon family, and they’ll cook the same way,” said Mark.

When was this caught? By whom?

fisherman

Matt Cardy/Getty

These questions are a good way to gauge both how fresh the fish is and how knowledgeable your fishmonger is. Don’t be afraid to ask where the fish came from and how it was caught (by spear? by net? by trawl?). Ask if it came in from a big industrial fishing fleet, or a fisherman-owned boat. “A lot of big boats go out for weeks at a time, while the little guys go out overnight,” Mark added—so that will affect how long it’s been since your fish was pulled out of the water.

While you’re thinking about freshness, check out the fish case: Is there a fishy smell in the air? (If so, bad news.) The fish filets should look firm. The whole fish should look shiny, with clear, bright eyes; the gills should be reddish. Mark advised that you should “be suspect if the gills are pulled out of whole fish”—it’s a sign the seller is trying to hide how fresh the fish is.

What would you recommend?

fishmonger

Cameron Spencer/Getty

If you don’t know where to start (or just want to try something new), your fishmonger likely has a recommendation for you—or can tell you about something that they believe isn’t getting the love it deserves. For Mark, that’s albacore tuna, which is plentiful in the fall. Albacore isn’t as commercially desirable as yellowfin tuna is, but, said Mark, it’s delicious, and has a lighter, more delicate flavor.

A good fishmonger should also be able to to clue you in tovarieties of local fish that are abundant, cheap, and delicious. “Like porgy,” Mark told me. “They’re great fish. If we called it sea bream—it is a kind of sea bream—we’d probably sell a lot more of it.

Finally, they should be able to give you a recommendation for fish that are more sustainable and/or less overfished than their better-known counterparts. Shellfish, for example, have a very low environmental impact. And you can substitute overfished cod for haddock, hake, or pollock.

What do I do with this?

calm

Photo by Mark Weinberg

Many fishmongers can offer suggestions on how to cook a fish—or how to substitute one fish for another. “We ask if they [the customer] want something firm and meaty or light and flakey. And then we suggest something seasonal based on that,” Mark said. But the simplest thing you can do, which is what Mark recommends if you’re not so familiar cooking fish, is rub a bit of oil on both sides of the fish, sprinkle on salt and pepper, bake or broil the fish, and serve with lemon. Pan-frying is another excellent, simple option.

Can you help me do X?

scale2

Photo by James Ransom

Ask for advice! Whether you just need them to scale, gut, and filet a whole fish or are looking for a fish that won’t make your house smell, they should be able to help.

How should I store it until I cook it?

salmon2

Photo by James Ransom

Plan to cook the fish a day or two after you buy it—and just leave it in the packaging your monger wraps it in.

If you need to take it out of the packaging, place it in a zip-top plastic bag, squeezing the air out and sealing the bag. Place the bag between two layers of ice in a colander set over a bowl, and put the whole thing in the refrigerator.

Why It’s A Good Idea To Grill Fish With The Skin On

Whole sea bass ready to cook

Skin on or skin off? Asking that question when it comes to grilling or eating fish can elicit some strong opinions. Regardless of where you land on the culinary fish skin debate, there are lots of reasons for leaving it on, both during the cooking process and after the fish reaches your dinner plate. Some preferences come down to personal taste or predispositions, while others rely on the nutritional attributes of fish skin.

There’s no question that fish overall is considered a heart-healthy food that’s chockfull of vitamins and antioxidants, according to WebMD. The omega-3 fatty acids in fish can help maintain brain health during aging, lower the risk of heart disease, thwart depression, aid in thyroid function, and provide protein for healthy muscles and organs. But how many of these benefits come from leaving the skin on your fish? That can depend on the type of fish you choose.

Fish skins have notable benefits
Pan frying fresh salmon
Though most fish are tasty, they’re not all created equal when it comes to benefits for humans. Generally, the good-for-you fatty oils you get from eating the flesh of a fish are also present in the skin. Healthline recommends eating low-mercury fish such as salmon, tilapia, flounder, and cod, noting that mercury levels can be present in the skin as well as in the flesh. In an Epicurious interview with Mark Usewicz, chef and co-owner of Mermaid’s Garden sustainable seafood market, he expresses a similar preference for eating extra-crispy fish skin from species such as flounder and salmon, plus sea bass, snapper, and mackerel.

In addition to the well-known health benefits of eating fish in general, consuming fish skin also can help maintain healthy human skin, per Healthline. It contains vitamin E, which can protect your skin from sunburn and may help improve eczema. The collagen in fish skin could facilitate hydration, elasticity, and potential wrinkle resistance. Since fish flesh on its own is typically low in collagen, according to Fine Cooking Magazine, leaving the collagen-rich fish skin on while cooking can coat and lubricate the entire fish with healthy collagen.

A boost to taste and texture

platter of cooked fish
Especially when it’s pan-fried or grilled, crispy fish skin can be delicious, and leaving the skin on can make for a better cooking experience. According to Bon Appétit, cooking fish with the skin side down in the pan, on either the stovetop or grill, protects the flesh from getting burned or dried out, and it helps to make flipping easier without reducing your perfect catch into a crumbled mess. Cook it skin-down until about 90% done before flipping.

For the best crispy texture, make sure the fish skin is dry before cooking, explains Serious Eats. You can accomplish this by lightly scraping a knife across the surface several times, similar to how a windshield wiper skims glass, and then patting the skin with paper towels. Avoid using nonstick pans if you want the ultimate crisp factor. Instead, reach for your seasoned cast iron or carbon steel pans whenever possible.

It’s a pretty universal consensus that eating fish skin is safe, healthy, and delicious when crispy. So, dive right in and let nature’s aquatic wonders do what they’re meant to do.

A Beginner’s Guide to Grilling Fish

Grilling a salmon fillet on a cedar plank

Cooking fish can be stressful for beginners. It seems fragile, delicate, it’s expensive (at least relative to, say, hamburger), it has bones, it has a face—whatever it is, there’s an intimidation factor for sure.

And the same is true for learning to grill. So when it comes to grilling fish, it’s like a double-whammy. But with this beginner’s guide to grilling fish, we’ll break down everything you need to know, including prep, tools, tips and basic techniques.

Start With a Clean Grill

It’s probably worthwhile to remember that people have been catching fish and cooking them over a hot fire for at least 100,000 years. Not to diss the Neanderthals, but if they could do it, so can you.

And the first thing to know is that a clean grill is everything when it comes to grilling fish. Because fish is delicate, and it can stick to your grill, making turning it difficult and leading to all kinds of other problems. And one of the reasons fish will stick is if the grill isn’t clean.

All those little specks of burnt on crud that might be invisible to a steak or a burger will grab onto your fish the same way the tread on a tire grips the road. So take a few extra moments to thoroughly scrape, brush and oil your grill before putting the fish on it.

Of course you should clean your grill anyway. But with fish it’s especially critical. Here’s more on taking care of your charcoal grill.

The Best Fish for Grilling

Your next decision will be what type of fish to grill. Basically any fish can be cooked on a grill, but some varieties and cuts are more forgiving of mistakes and thus preferable for a beginner.

These fish have firm flesh that won’t fall apart on the grill, and they are available in steaks or thick fillets, which helps them stand up to the high heat of the grill.

With that said, a medium fire is best for grilling, which if you’re using a gas grill means about 350 F. If you’re grilling over charcoal, 350 F corresponds with about half a chimney of coals. If you’re not familiar with using charcoal chimneys or how to control the temperature on a charcoal grill, here’s a start. Examples are:

  • Halibut
  • Swordfish
  • Salmon
  • Tuna
  • Mahi-Mahi

What you’ll want to do is brush the steaks with oil, season them, and grill for 7 to 8 minutes per inch of thickness, turning once halfway through. In other words, for a steak one inch thick, grill for 3 to 4 minutes, turn and grill for another 3 to 4 minutes.

And by the way, one inch should be the minimum thickness, especially when you’re first learning how to grill fish. The thicker the steak, the more forgiving it will be.

A lot of folks get hung up on marinating, like it’s going to be the answer to everything, but the reality is that marinade only penetrates a couple of millimeters into the flesh, and if you leave a piece of fish in the marinade too long (like more than 30 minutes), it will start to suffer from unwanted texture changes.

You would do just as well to simply dip your fish in the marinade, let any excess drain, and then grill it. Or you could just brush your marinade on while it cooks.

One last thing to remember is that you should let your fish come to room temperature before grilling it. That means leave it on the counter for 30 to 60 minutes. That doesn’t mean leave it in the sun for 30 to 60 minutes, however. If you’re outside, make sure it’s covered and in the shade.

Grilling Fish on a Plank

The easiest method of all is to grill your fish on a plank. A plank is simply a slab of wood, usually cedar, but sometimes oak, maple, cherry or apple. After soaking the plank for a couple of hours, simply brush the top with oil, lay it on the hot grill grate and place the fish on top. Cover the grill and cook for about 12 minutes for an inch thick steak (about 50 percent longer than when cooking directly on the grill). You don’t even need to turn the fish.

One advantage to this technique is that the plank will start to smolder (although it shouldn’t actually ignite), which will add a wonderful smoky flavor to the fish that you can’t obtain when grilling directly on the grate. And you can use a plank on a gas or charcoal grill. Here’s more about grilling fish on a plank.

Tips

  • Not flake too easily: Many recipes say that fish is done when it flakes easily, but this is actually the point at which fish is overcooked. Instead, strive to remove the fish from the grill when it just starts to flake, not when it flakes easily.
  • Marinate briefly: Marinating longer than 30 minutes not only has no added benefit, it can also degrade the quality of the fish.
  • Leave the skin on: The skin will not only turn crispy, it will also protect the fish from overcooking. Fillets should start skin side down and then turn them halfway through. Steaks will have skin on the edges.
  • Grilling whole fish: When you’re ready to step up to grilling a whole fish (like trout, snapper, sea bass), stuff it with herbs and citrus and tie it closed with butcher’s twine. A plank works wonderfully for whole fish too.

3 Easy Ways to Grill Seafood

Grilled Seafood on a White Plate

Learn a few fool-proof ways to maximize the flavor of fresh seafood using a grill!

Preparing seafood can be intimidating. It can be especially challenging to cook on the grill because its texture allows it to easily stick to the hot grates. Don’t let this deter you from taking advantage of Litchfield’s Saltwater grille fresh seafood selection! I have a few simple tips that will have you grilling fish like a pro in no time!

Pre-Grill Seafood

Tips For Getting Started

  1. Whether you’re grilling or cooking with a pan, fish will likely always stick to the cooking surface. The first thing you can do to help prevent this is pat the fish dry on both sides with a paper towel. Anything that is wet is going to want to stick to a hot surface, so anything you can do to help cut back on the moisture will absolutely help.
  2. The second thing to remember is to let the fish cook. It’s hard to be patient when you’re constantly worried about overcooking your fillet. Let the fish naturally pull away from the grill grates or pan before being so eager to flip it after 2 minutes. You may cook the fish for 6-7 minutes on one side and only 2-3 minutes on the other side after flipping.
  3. Lastly, before we get into cooking on different surfaces on the grill, remember to use some sort of oil or butter on the fish before cooking. Oil or butter will help lubricate the fish, allowing it to release from whatever it is you’re cooking on. No need to drown the fish in oil, but a few teaspoons can go a long way.

Cooking Methods

Grill Pan

The easiest way to cook fish on the grill is with a grill pan. Grill pans are cast iron and have built-in grates that will help you achieve grill marks and smoky flavor. Start by heating the pan on the grill to high heat, I recommend 550°F. Let it sit for about 10 minutes.

Make sure the fish is patted dry and seasoned with salt and pepper. Then, add some oil to the grill pan, followed by the fish. Remember to let the fish gently pull away from the pan instead of trying to scrape it off. This procedure will work for any piece of fish, although I recommend using a steak fish like swordfish, tuna or salmon. If you close the hood of the grill while cooking with a grill pan, the heat will be intense and the fish will cook fairly quickly.

Fish in Grill Pan

Salt Block

One of the most unique ways to cook on the grill is with a salt block. A salt block is a large chunk of salt that can be used in the oven or placed directly on a grill preheated to 550°F. The goal is to make sure that the salt block is very hot to prevent the fish from sticking. There is no need to season the fish before cooking on a salt block because it will absorb the delicious salt during the cooking process!

Once the salt block is hot, it will start to lighten in color. Once hot, drizzle some oil right onto the salt block, followed by the fish. Close the hood of the grill to allow the fish to cook evenly on all sides. After 6-8 minutes, simply flip the fish over and cook for another 2-3 minutes. I used grouper to cook on the salt block and it was seasoned to perfection. Any fish similar to grouper, such as sea bass, mahi mahi or halibut would be delicious, too!

Fish on Salt Block_

Basket

The last, and most practical way to cook fish on the grill is with a basket. This is a fool-proof way to ensure that fish will not stick to the grill, as it will not touch the grates directly. With that being said, it is incredibly important to still pat the fish dry and brush it with oil, because it can absolutely stick to the basket. Using a basket will allow you to cook skin-on fillets and crisp them to perfection without worrying about sticking. The only other way to cook fish with the skin on is in a hot sauté pan.

You can also add flavors like lemon and herbs to the fish while in the basket. For this method, I prefer to use whole, skin-on fish or any skin-on fillet, such as walleye.

Fish in Basket

That’s all there is to it! Have fun and get creative cooking seafood on the grill and remember, you are only limited by your own creativity. With these easy ways to cook fish on the grill, you can now do it with confidence.

How to Grill a Steak: 8 Tips for Success

Steak on grill - how to grill a steak

Steak is life. Grill is life. The quest to master the grill, to be a master griller, is a worthy pursuit.

Luckily, grilling the perfect steak isn’t complicated – anyone can do it, regardless of chef skills. Impress your friends and family by using our eight secrets for the grilling the perfect steak. Follow these grilling tips for steakhouse-worthy results at home.

Start with the best steak

It’s important to start with the best steaks you can find… not all steaks are created equal. Obviously, we’re partial to Omaha Steaks, and with good reason. Every Omaha Steak is hand selected for quality and marbling, aged 28+ days for maximum tenderness, hand-carved by master butchers and flash frozen to preserve flavor and texture of your steak until the moment you’re ready to grill. Our beef is better… 100% guaranteed.

Grilling tips for the perfect steak

1. Climatize the steaks

How to Grill a Steak: 8 Tips for Success

Climatizing your steak simply means “bringing the steak up to room temperature,” and is the easiest thing to do for more even cooking results. Simply set your steaks on a plate, outside of the refrigerator for 30 minutes to an hour before grilling.

2. Season steaks in advance

How to Grill a Steak: 8 Tips for Success

Season your steak at least 30 minutes before grilling – this is the secret to big flavor through a better crust. Basically, the salt or seasoning get inside the steak, adding flavor and drying out the surface of the steak. Season simply with kosher salt or use a complete steak seasoning (we love Omaha Steaks Seasoning). Make sure to season the top and bottom. For even better results inside and out, consider using a simple dry brine.

3. Oil the grill grates

How to Grill a Steak: 8 Tips for Success

Oil the grill, not the steak! Keep steaks from sticking to a hot grill applying a bit of oil just before grilling.  You can oil your grates using tongs and a rolled-up paper towel dipped in vegetable oil. Grill spray works too, but you may get flareups.

4. Proper grill temperature

How to Grill a Steak: 8 Tips for Success

The most important tip for grilling a perfect steak is a HOT grill. Use indirect and direct heat on either a charcoal or gas grill for the best results. Sear the first side of your steak on the hot side of the grill and finish in indirect heat after flipping. Make sure to space your steaks about 1 inch apart to allow each steak to cook thoroughly.

5. Use the 60/40 rule

How to Grill a Steak: 8 Tips for Success

When and how often to flip a steak is a subject of great debate and strong opinions. And nobody is wrong. Basically, you need to make sure each side is exposed to direct heat long enough to sear. And you want to make sure that it cooks evenly towards the center. The easiest way to achieve that is to flip it once.

The 60/40 rule is a simple guideline for making that single flip. That means 60% of the cook time should be on the first side of the steak and 40% of the cook time on the other side, after the flip.

6. Nail the temperature

How to Grill a Steak: 8 Tips for Success

The most accurate way to measure the temperature of your steak is with a meat thermometer. Use the Omaha Steaks cooking chart included in every Omaha Steaks steak box, the Omaha Steaks mobile app or our guide to steak doneness and temperature charts.  Here is a general guideline for temperature and steak doneness:

  • Rare:120F
  • Medium-Rare: 130F
  • Medium: 140F
  • Medium-Well: 150F
  • Well: 160+F

7. Keep the Lid Closed

How to Grill a Steak: 8 Tips for Success

It’s tempting to ogle your steak while it’s cooking, but it’s best to keep the lid closed to ensure an even cook. This also helps control flareups by not adding more oxygen to your fire or burners, keeping you safe while grilling. Our steak cooking charts and app timer are based on keeping the lid closed.

8. Rest the Steaks

How to Grill a Steak: 8 Tips for Success

The most important step to a perfect steak is to let it rest after cooking. Monitor your steak temperature on the grill, and take it off the heat when it’s 5 – 10 degrees below your target temperature. Let it rest for just 5-10 minutes, and it will come up to temperature and the juices will redistribute to make every bite more delicious. The juicy, tender results are worth the wait. Top your steak with a compound butter for added flavor and serve with a signature Omaha Steakhouse side dish for a perfect grilled steak dinner.

Enjoy!

Grilling Tips for Perfect Grilled Meat

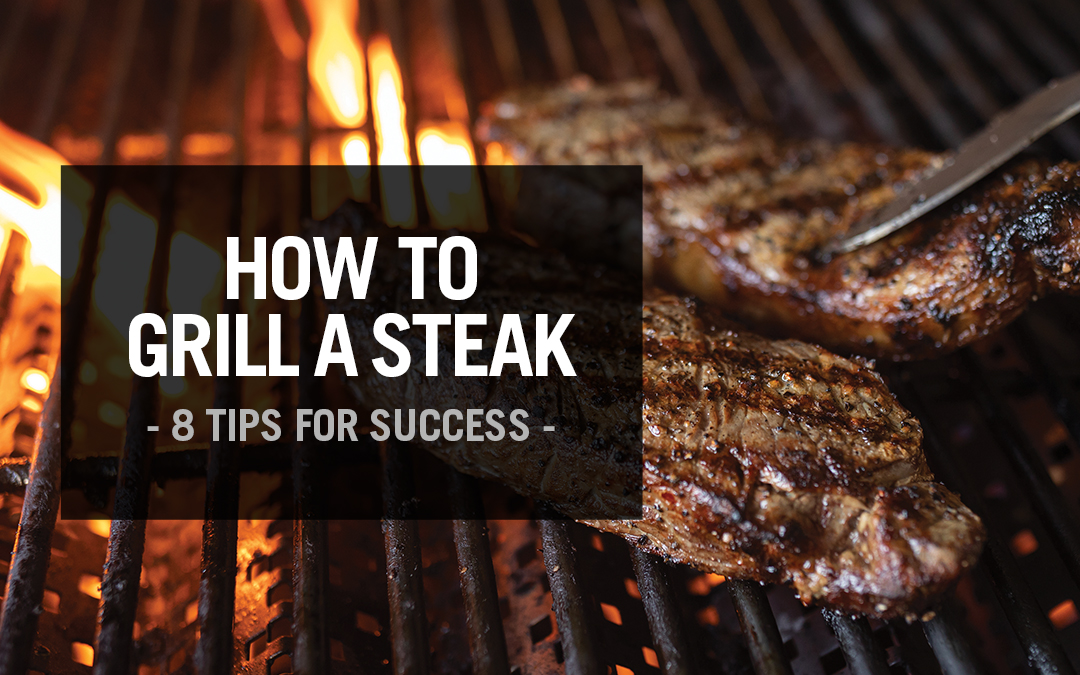
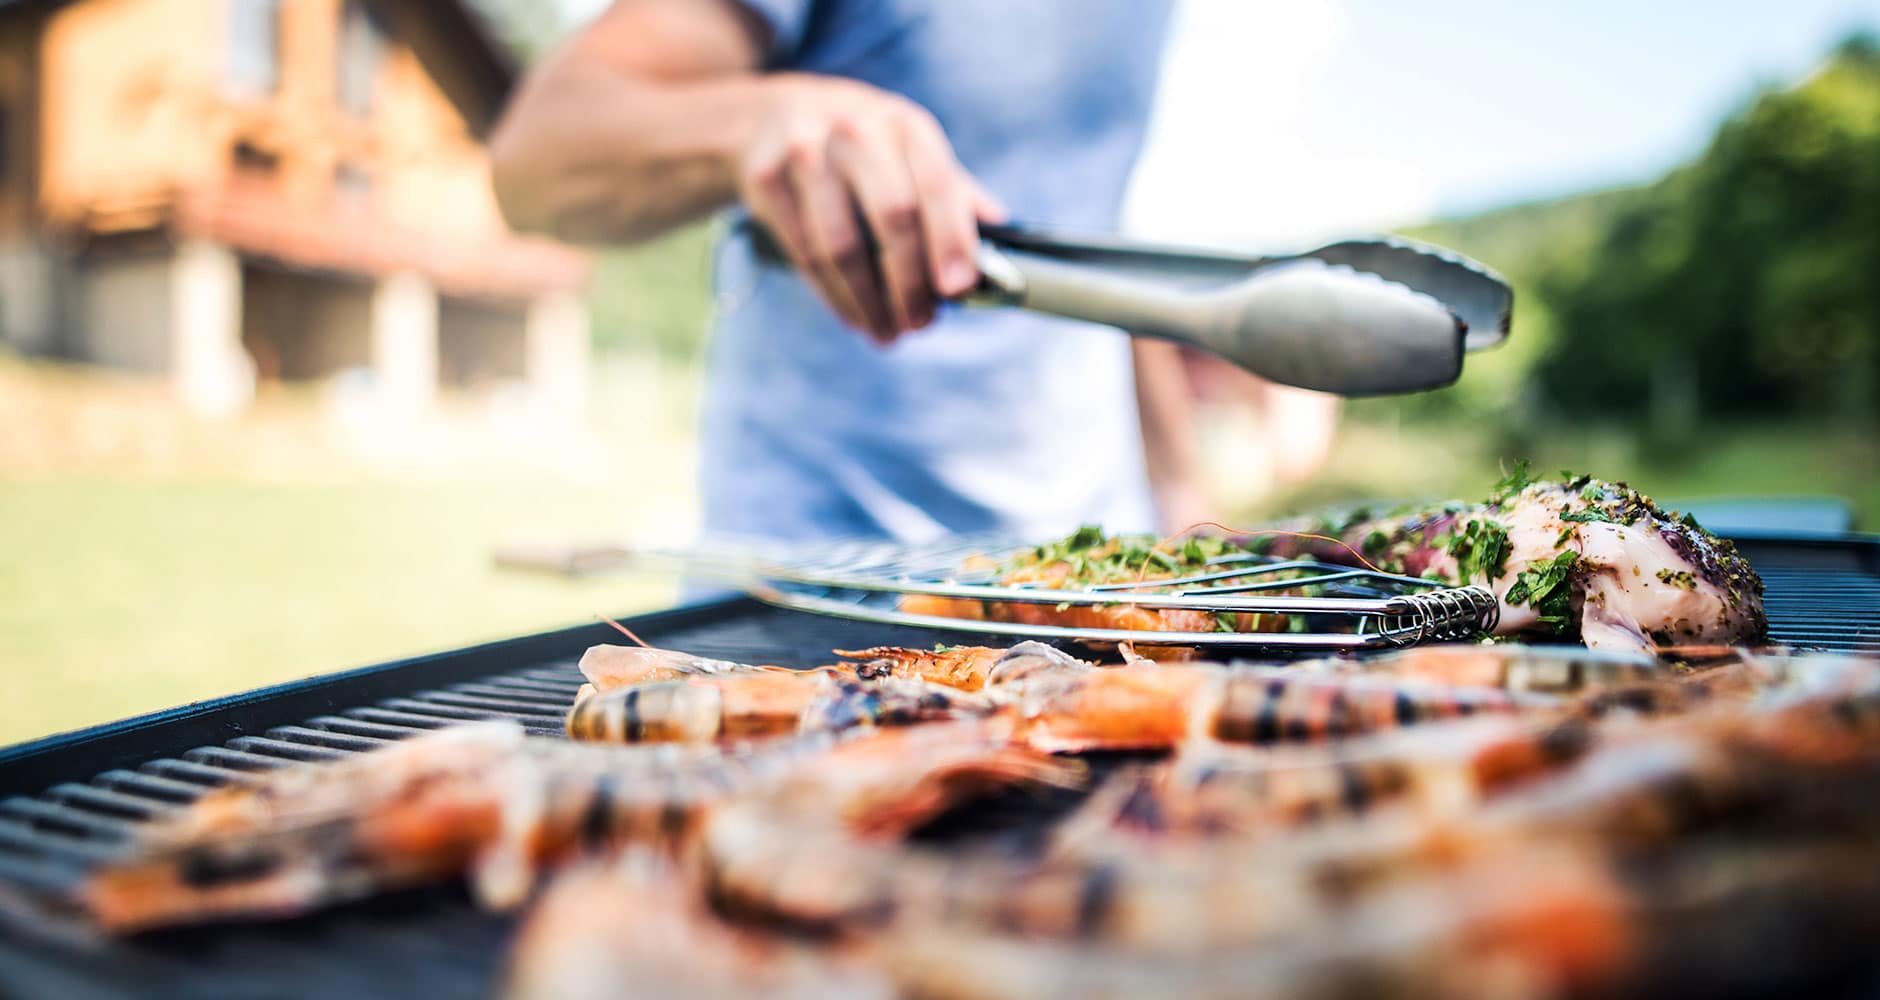
With grilling season upon us, many restaurateurs and caterers are firing up their commercial grill and dishing out delicious steaks, ribs, sausages, and chicken thighs. If you own a steakhouse, barbecue restaurant, or smokehouse, expertly preparing a variety of meats is essential to the success of your business, leaving the savvy griller constantly on the lookout for new grilling tips.

Whether you’re a grill master or novice, attention to detail leads to big improvements in the flavor, texture, and quality of your grilled meat. If you’re looking for grilling tips that will take your skills to the next level, check out our grilling tips and get a sizzling grill now!

Grilling Tips

Use our grilling tips to learn how to prep your meat for grilling, how to maintain your grill, and how to deliver delicious grilled food.

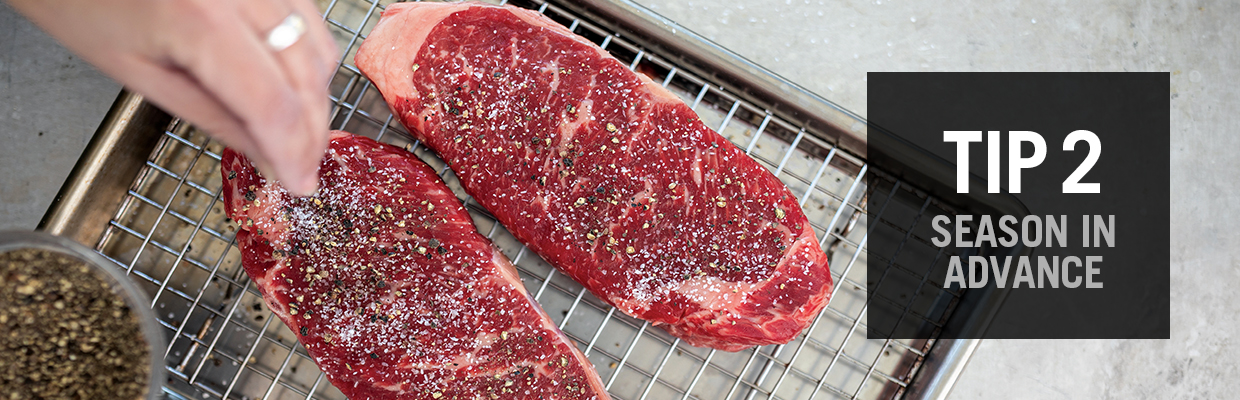
1. The Best Time to Salt Meat

salted steak

Salt your meat either an hour in advance or right before you place it on the grill. Cook, writer, and TV personality Jess Pryles, also known as the “Professional Hardcore Carnivore,” explains why:

“Salt is a very powerful seasoning. Not only does it make things infinitely more delicious, but it’s also full of natural alchemy. Salt can draw out moisture from your meat, which is a bad thing for those who like juicy steaks. To avoid this, you either want to salt an hour or so in advance to allow the briny liquid time to reabsorb into the meat, or salt just before the meat hits the grill. Any time in between – particularly that 15-20 minutes prior zone – will not do your steaks justice.”

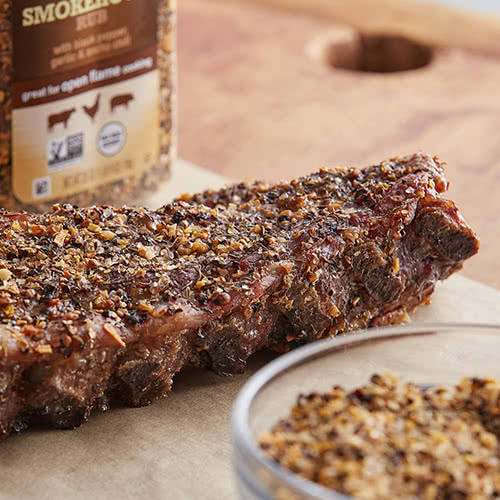
If you want to let the meat’s natural flavor take center stage, stick to a classic combination of salt and pepper when preparing your steaks or chicken thighs. For a hint of heat, create a dry rub using a mix of spices including paprika, cayenne pepper, ground coriander, onion powder, and garlic powder.

2. Preparing Meat for Grilling in Advance

Allow your steaks and other meats to reach room temperature by removing them from the refrigerator 20-30 minutes before grilling. Don’t forget to set a timer. While meat left outside of the fridge for 20-30 minutes is perfectly safe, letting raw food sit for too long can become dangerous.

Take caution: While grilling room temperature meat is ideal, chilled raw meat will still easily reach safe-to-serve temperatures. However, when completely frozen steaks are thrown directly on the grill, they are often unsafe to consume. In most cases, steaks grilled from frozen will yield meat that is raw in the center and overcooked around the edges. By allowing your meat to come to room temperature before grilling it, you’ll never run the risk of serving meat that is warm on the outside and cold on the inside. Your room temperature meats will not only be safe to consume, but they will also grill faster and more evenly.

When your timer goes off and your meat has reached room temperature, pat it dry with a paper towel. Lightly brush olive oil onto your meat and generously season it.

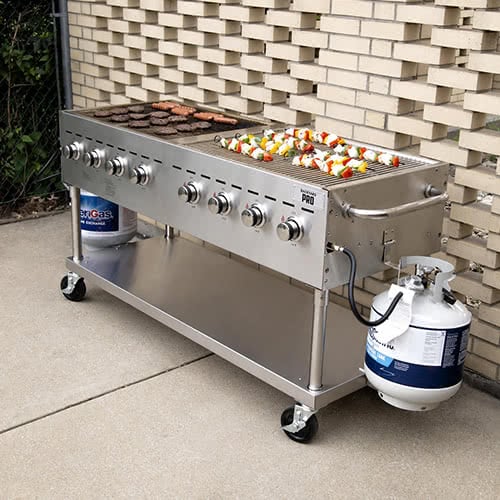
3. Prepare Your Grill

veggies and meat on a hot grill

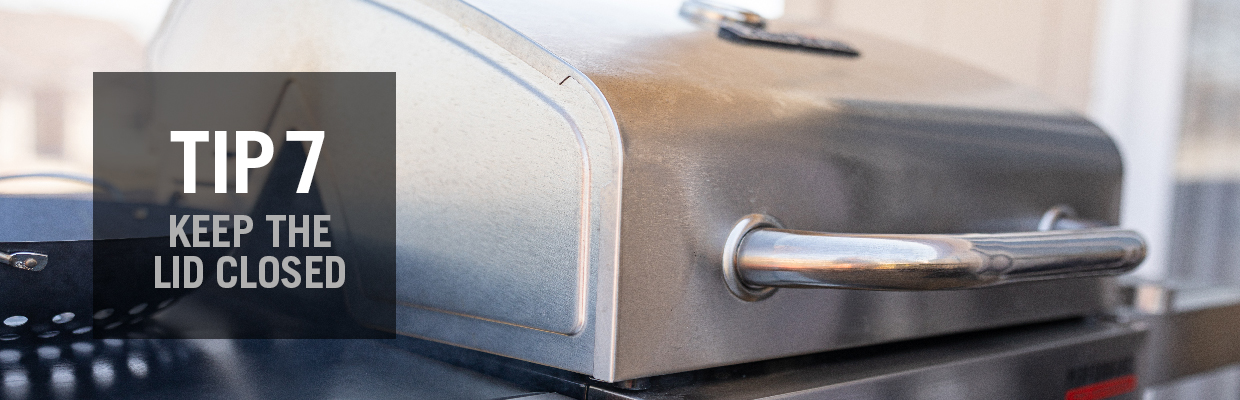
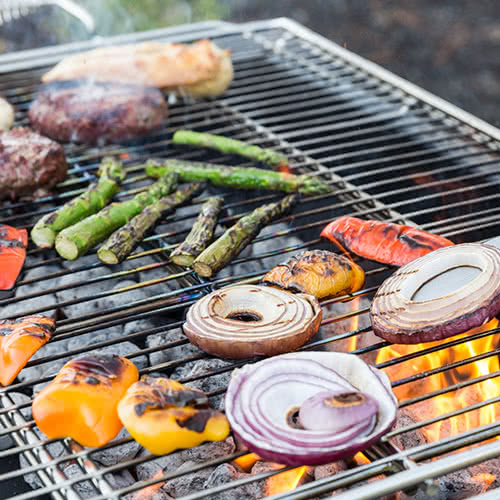
Unsurprisingly, no grilling tips would be complete without addressing the grill itself! For the best results, you need to invest the same level of care and attention into your grill as the meat you’re about to put on it. When preparing your grill, it is important to create various zones for direct and indirect heat.

When using a charcoal grill, don’t cover the entire grill with charcoal briquettes. Instead, create a hot zone in one area of the grill while leaving a separate area off to the side for indirect heat cooking. Creating these hot and warm zones allows you to cook different items at once while providing a safe space for food to cook further away from the flames.

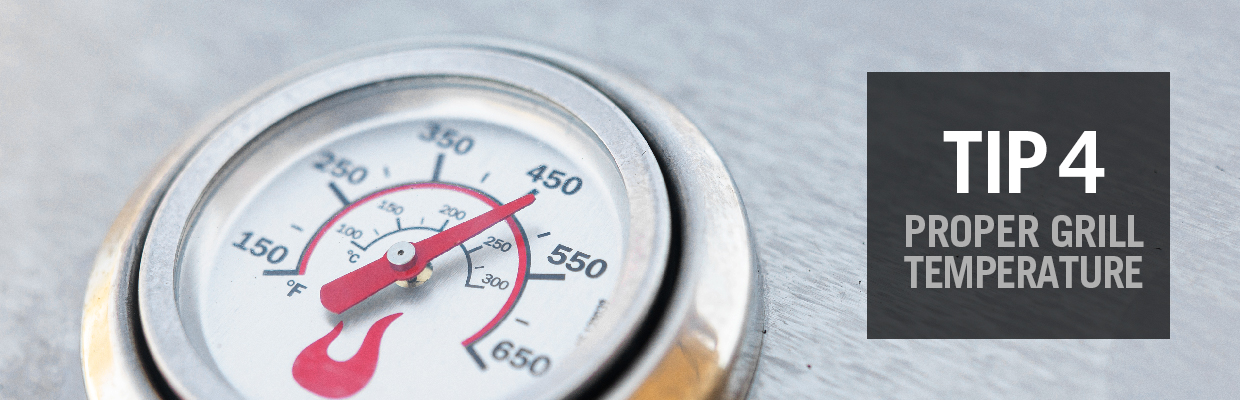
4. How to Gauge Your Grill’s Temperature

Before you place your meat onto the sizzling hot grill, you need to make sure your grill is at the right temperature. There are typically three levels of heat when cooking on a grill: high, medium-high, and medium.

Grill Gauging Trick: Hold your hand about six inches above the grate. If you can withstand the heat for six to seven seconds, you’ve reached medium heat. Four to five tolerable seconds indicate medium-high heat, while one to two bearable seconds means you’re working with a high heat grill.

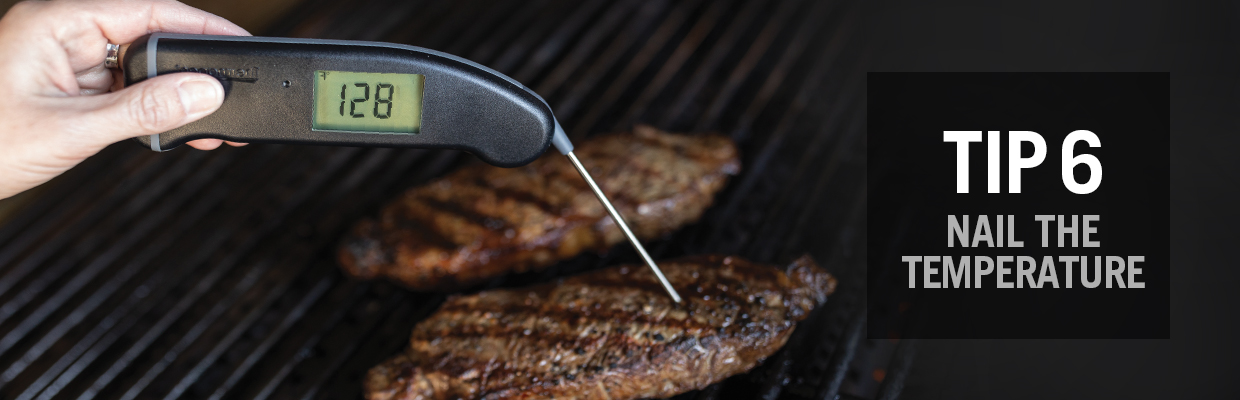
5. Use a Meat Thermometer

The more you slice, pierce, or puncture meat, the drier it becomes. When you cut into the meat, juices escape, resulting in a disappointing dish. When cooking on the grill, never puncture the meat with a fork or knife. Instead, use tongs or turners to flip meat, and use a high-quality food thermometer to check the internal temperature.

Here’s a breakdown of each heat level on a grill and what meats can be cooked at that temperature:

    • High Heat: 450°-650° Fahrenheit

High heat is recommended when preparing steaks, pork chops, kabobs, or tuna steak. Getting your grill around 500° Fahrenheit will create a sizzle when the meat hits the grates and produces attractive sear marks your guests will love.

    • Medium-High Heat: 375°-450° Fahrenheit

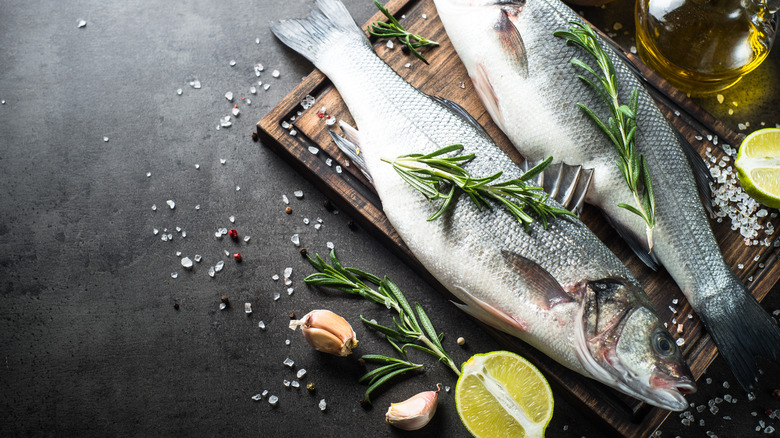
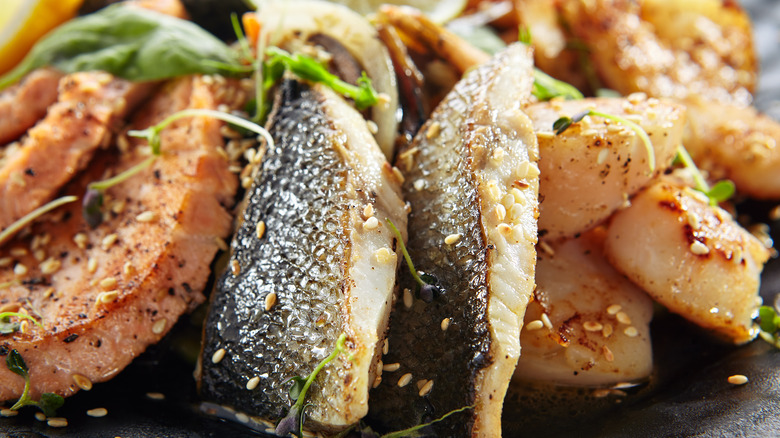
Medium-high heat is ideal for cooking hamburgers, vegetables, and fish. This temperature will cook proteins slower to ensure their middle portions reach proper internal temperatures while still creating a searing effect on the meat’s exterior.

    • Medium Heat: 325°-375° Fahrenheit

Medium heat provides enough warmth to create a satisfying browning effect on the outside of your proteins while still bringing the insides to a proper internal temperature. This makes it ideal for grilling chicken, turkey, roasts, and sausages.

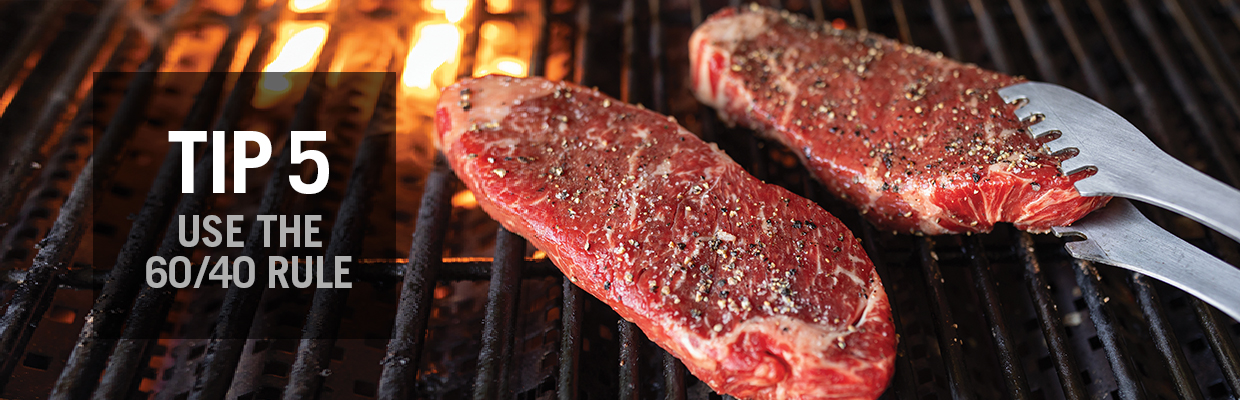
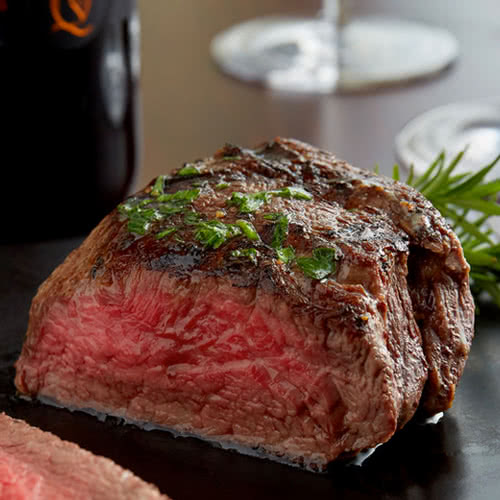
Steak Grill Times and Temperatures

medium rare cooked steak

A good steak is a beloved menu item everywhere from sandwich shops serving steak sandwiches to upscale steakhouses. The ideal steak grill times and temperatures fluctuate depending on how you want your steak prepared. You can master the art of achieving the perfect steak by viewing our comprehensive steak doneness guide, or you can introduce yourself to the basics below.

The first step in achieving your ideal steak is setting your grill to the appropriate temperature. While cook time is based on desired consistency, grill temperature is based on the steak’s thickness.

  • 1/2″ thick steaks should be cooked at high heat.
  • 3/4 to 1″ thick steaks should be cooked at medium-high heat.
  • Over 1″ thick steaks should be cooked at medium heat.


Once you achieved the appropriate heat for your meat’s thickness, you’re ready to place your meat on the sizzling grill. Here is how to prepare steaks to achieve each doneness level.

  • Extra Rare/”Blue”: Extra rare/”blue” steaks should be grilled for approximately one minute on each side to achieve an internal temperature of 115°-120° Fahrenheit.
  • Rare: Rare steaks should be grilled for approximately one and a half minutes on each side to achieve an internal temperature of 125°-130° Fahrenheit.
  • Medium-Rare: Medium-rare steaks should be grilled for approximately two minutes on each side to achieve an internal temperature of 130°-140° Fahrenheit.
  • Medium: Medium steaks should be grilled for approximately two minutes and fourteen seconds on each side to achieve an internal temperature of 140°-150° Fahrenheit.
  • Medium-Well: Medium-well steaks should be grilled for three to four minutes on each side to achieve an internal temperature of 150°-155° Fahrenheit.
  • Well-Done: Well-done steaks should be grilled for approximately four to five minutes on each side to achieve an internal temperature of 160°+ Fahrenheit.

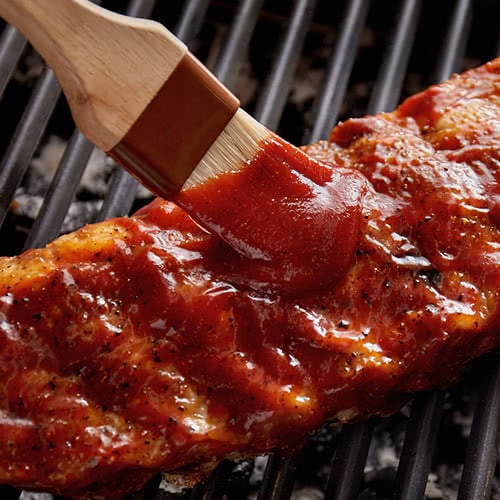
6. Delay Saucing Grilled Meat

brushing sauce on meat

If you cover proteins with a sauce containing sugar before throwing them on the grill, you’ll likely produce charred and burned meat; sugar caramelizes when exposed to high heat. Common culprits include barbecue sauce, fruit glazes, and teriyaki-based sauces.

To avoid this mistake, apply your glazes and sauces during the last few minutes of grilling. You won’t gain any added flavor by trying to include sauces earlier in the grilling process. To achieve a deep flavor that will permeate the entire cut of meat, marinate your meats before grilling.
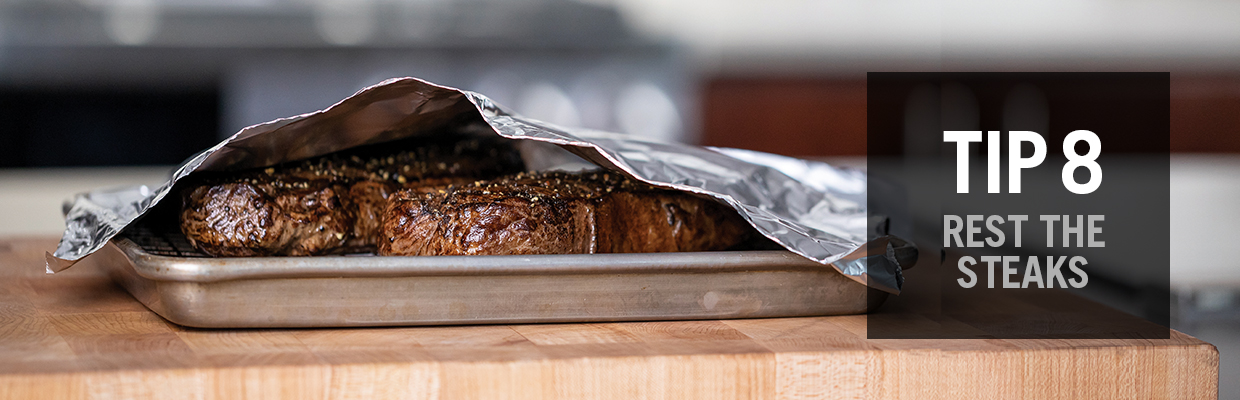
7. Let Meat Rest

When your grilled meat is served makes or breaks whether your attentive cooking efforts are appreciable. Exact rest times vary, and how long to let steak rest is slightly different than how long you should let chicken rest.

As a general rule, once your meat is cooked through, you should let it rest for 5-10 minutes before serving it. During this time, the juices in your steak, pork chop, chicken thigh, or lamb kabob become evenly distributed throughout the protein for optimal tenderness.

How to Choose a Grill

Now that you know the top grilling tips, it’s time to choose a grill.


In the game of delicious grilled meat, there are two teams: gas and charcoal. In the next section, the two teams square off, revealing the fast facts you need to decide between a gas and charcoal grill.

When you’re ready to make a purchase, use our in-depth outdoor grill guide to make the most informed choice. We explain everything from grill capacities and fixed/portable grill requirements to grill accessories and BTUs.


Gas Grill vs Charcoal Grill

Before learning how to choose a grill, you must understand the difference between a gas and a charcoal grill. In general, gas grills are considered easier to work with because of their temperature controls and steady heat source. Charcoal grills tend to reach higher temperatures, but the temperature is less regulated and there is always the possibility of flare-ups.

Gas Grill

gas grill

Gas grills offer a time-sensitive, direct-heat grilling method. Fueled by either a propane tank or natural gas, a gas grill allows you to create succulent grilled dishes without tending to a fire.

While natural gas grills exist (grills that connect to gas lines), they are uncommon. The most popular gas grill is the propane grill. Propane grills are fueled by tanks of liquid propane and create more steam inside the grill than charcoal, keeping the meat moist.

When to Use a Gas Grill:

  • When you’re grilling thin cuts of meat or tough kinds of meat such as pork chops
  • When your time is limited
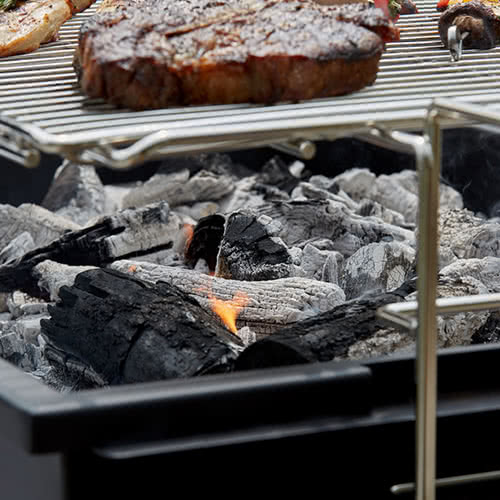
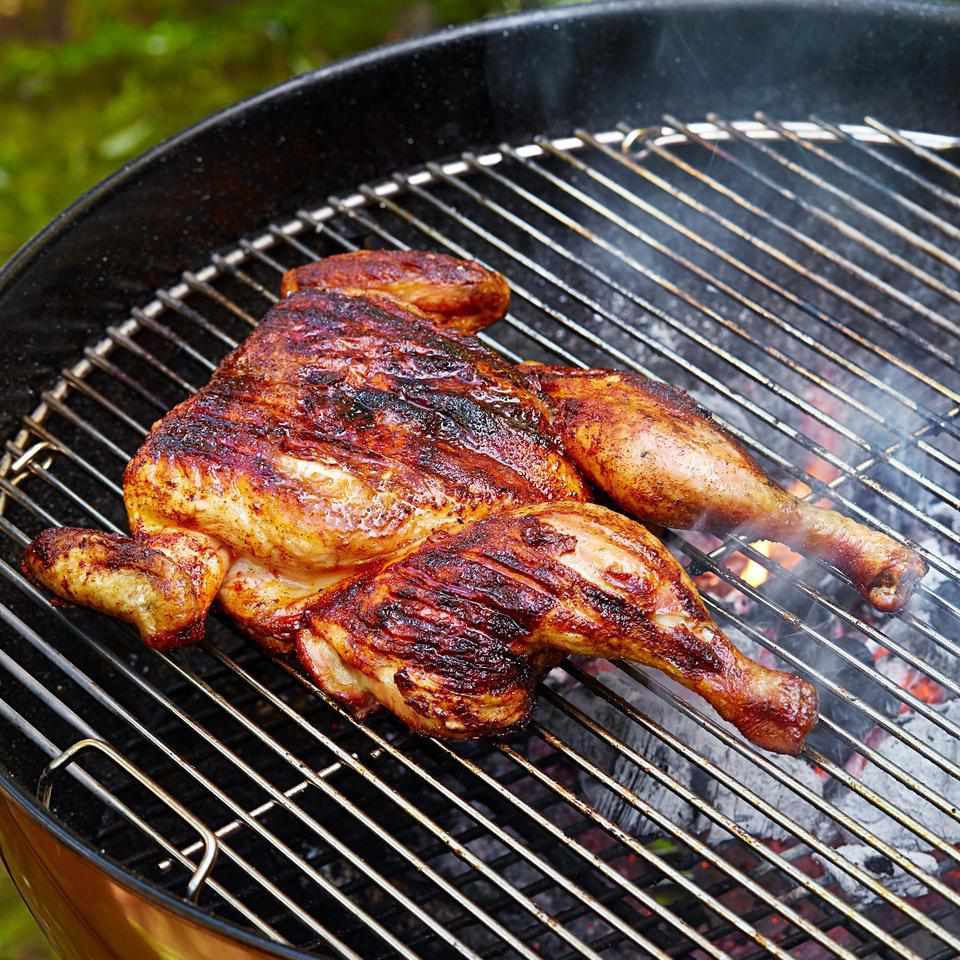
Charcoal Grill

charcoal grill

Charcoal grills use a dense layer of lit coals to cook food. Food grilled over the direct heat emitted by a charcoal grill achieves rich, smoky flavors. Arranging your coals and maintaining even heat emissions requires practice, and meat grilled on a charcoal grill takes longer to cook.

The benefits of charcoal grills are best appreciated in thick steaks, chicken, turkey, and ribs where the deep and smoky flavors permeate into the meat through a long, low, and slow charcoal grilling process.

When to Use a Charcoal Grill:

  • When you have plenty of time
  • When you want a smokey, campfire flavor
  • When you want perfectly grilled fish with a crispy outer layer and moist center
  • When you’re grilling a thick cut of meat that is enhanced rather than burned by sear marks

Practical Considerations of Investing in a Gas and Charcoal Grill

To choose between a gas and charcoal grill, you need to honestly assess your intended use, experience level, and flavor preferences. If you feel your most popular dishes could benefit from both methods but you can only invest in one, here are a few practical considerations to help you decide between a gas and charcoal grill.

  • Cost: Charcoal grills are less expensive than gas grills.
  • Safety: Gas grills are safer than charcoal. Evaluate your working environment and determine whether cooking with burning charcoal is a fire hazard.
  • Cleaning: Gas grills are easier to clean.
  • Temperature Control: It is easy to adjust the temperature on a gas grill, whereas the lit charcoal takes constant supervision to deliver evenly cooked meat. 
  • Accessories: Most gas grills are compatible with grilling accessories that create different flavor profiles. 

If you want the rich smoky flavor charcoal provides, but your space doesn’t allow you to safely operate a charcoal grill, check out our guide to getting smoky flavor without firing up a grill.

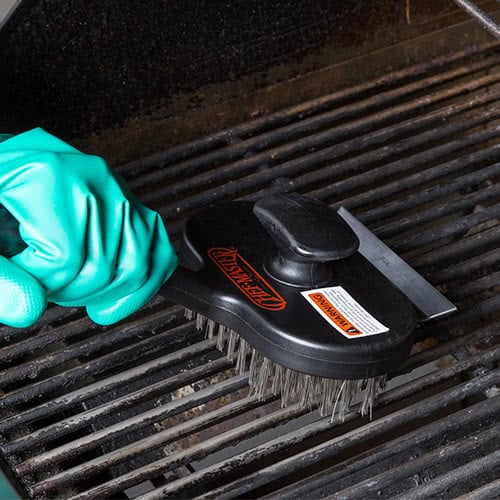
Cleaning Grill Grates

person cleaning grill grates

No matter what type of grill you choose to cook with, it’s important to learn how to care for your grill grates and keep them clean in between uses.

Use a grill brush to remove charred food particles left behind after grilling. By neglecting to clean your grill after every use, your food can easily become contaminated with remnants of last night’s dinner. If you’re using a charcoal grill, cleaning grill grates is particularly important because it drastically reduces the chance of flare-ups.


Learning how to choose a grill that will deliver your desired flavor profile and educating yourself on the top grilling tips elevates your dishes above what patrons are grilling at home, pulling them through your doors time and time again. Our grilling tips will turn novice and experienced grillers alike into pitmasters. Get a sizzling grill right now, churning out juicy, succulent meat guests rave about.

Contact us for more information.

Saltwater Grille: Sticking With What Works

Head out to Litchfield for a summer dinner and most think of the picturesque town green and its sprinkling restaurants that have a stellar history and reputation.

But drive west a couple of blocks and there is another rural gem and new owners are breathing new life into this charming landmark as well.

Litchfield Saltwater Grille, owned for many years by Brett Clugston and her husband, Albert, was sold eight months ago to a couple looking to do “something different” after they became empty nesters in Wisconsin.

New owners Andy Stowers and Brook Noel are not only loving the change of geography, but a shared profession they say is an adventure that they love.

“We were looking for an adventure,” said Noel. Our daughter had gone off to college and we were empty nesters. Andy was in corporate America and had enough. I was an author who had helped friends with their restaurant in Wisconsin, took classes in the hospitality program at Cornell and knew the business. We wanted to be in New England and knew if we were going to make a big change in our lives, now was the time.”

The couple looked at dozens of restaurants from Boston to Guilford. and when they found the Litchfield Saltwater Grille, they knew they found a match.

“It felt a lot like our home in Wisconsin,” said Noel. “A small town with a lot of culture and a lot of New England charm. We just fell in love and knew this was the place.”

Noel and her husband were happy with what they saw in the place, which has a rustic charm with its wood wainscoting and soft-colored walls, a pleasant outdoor dining area that can be used even when it’s raining and a busy tap room with bar that has a lively and Yankee Magazine award-winning happy hour. So any changes were barely noticeable and limited to some sprucing up and some tweaking of the menu.

The new owners kept all the staff, which Noel said made for a seamless transition and gave them a source of information when it came to learning the ins and outs of the business and the area.

“We inherited talented, capable staff,” said Noel. “We were fortunate because there are so many moving parts to a restaurant and there were nuances we did not understand in a new state like liquor laws and suppliers. The staff is a resource for us.”

One thing they were not braced for was Connecticut’s reluctance to go out once the snow starts to fall.

“We took over and were hit with one of the worst winters here in a long time,” she said. “In Wisconsin you go out even in 2 feet of snow; we just drive everywhere there in snow. But here everyone hides and we had to come up with ways to coax people out.”

The restaurant has initiated a slew of special seasonal events, ranging from wine dinners with hot air balloon rides to live music on Thursdays and Sundays and tarot card reading on Mondays. A cigar dinner, a bridal show, an outdoor block party and the continued wine series are some of the other special events planned for fall.

But what’s a good restaurant without good food? Noel and her husband addressed that by bringing their own chef from Wisconsin, Rob Peotter.

With him came a wonderful recipe for a seasonal cheddar cheese soup that includes a hint of Wisconsin beer; stuffed sole and blackened tuna choices, which have been the restaurant’s most popular dishes. Noel and her husband kept the restaurants signature raw bar, with choices that include Oysters Alaska, featuring oysters and smoked salmon with caviar and dill; and the Freedom Tower, with little neck clams, oysters, jumbo shrimp, chilled lobster tail, smoked salmon and sliced rare tuna.

Raw bar platters range from $10 to $69, with salads from $4 to $12 and entrees from $16 to $48.

“We want to make changes gradually,” said Noel. “We have added more seafood options as well as filet and ribeye steaks. We liked the menu we inherited but wanted to round it out a bit more and are talking to customers to see what they like or what they would like to see added to the menu.”

And they don’t have any doubts they did the right thing.

“I think we made the right choices,” said Noel. “We have no regrets especially as we get more and more comfortable in our new home and our new business. The community couldn’t have been more welcoming, and we are looking forward to a long, successful business and life here.”

>>Litchfield Saltwater Grille, 26 Commons Drive, Litchfield, is open Monday from 4 to 9:30 p.m. and Tuesday through Sunday from 11:30 a.m. to 9:30 p.m. Information: 860-567-4900 or litchfieldsaltwatergrille.org

5 Tricks for Ordering Online Food Delivery

Pros and Cons of Restaurant Online Food Delivery Services | Fridge

As technology continues to integrate into our everyday activities, businesses have found more ways to make our lives as consumers easier. One such growing trend is food delivery. It’s become common to order food online and have it delivered instead of going into a restaurant and sitting down for a traditional meal.

This growth is mostly driven by millennials and younger generations who are reliant on apps and gig economy services. According to USA Today, recent research has found that 77 percent of millennials have used a food delivery service in the last 90 days, which is 26 percent more than all diners in the United States.

Getting food delivered is easier than ever, thanks to third-party ordering systems and apps like Menufy. Below are some of our best tips to make sure you have the best experience possible when ordering food.

1. Order Food Online Early so It’s Ready When You Get Home

Many people use food delivery as a backup option when they don’t want to cook or are tired after work. However, if you plan ahead, you and your family won’t be stuck hungry and waiting around for your meal.

Order your food before you leave work for the day or while you’re waiting to pick up your kids from school or after extracurricular activities. Most food delivery services provide estimated delivery times. While these aren’t always accurate, they give you a good rough idea of when you can expect your food to arrive. If you know you’ll get home around 6:00, start looking for food to order around 4:45 or 5:00.

If you are worried about missing the delivery if it comes before you get home, you can prepare for that too. Leave a note instructing the driver to drop the delivery off on the porch if no one answers the door, or call or text your delivery driver to let them know where you are. Of course, no one likes waiting for someone to arrive, so make sure you agree to a delivery time that’s after you’re likely to be home.

2. Order Healthy Before You’re Starving

Planning food delivery can also benefit your health. If you are trying to eat healthier or lose weight, schedule your delivery in advance by ordering before you are starving. The less hungry you are, the more likely it is that you’ll make a better food choice, like a salad or other lower-calorie option.

Ordering ahead of time also allows you to adapt to how long restaurants take to fulfill your order. If you know of a specific restaurant that has healthy options but usually takes longer than a fast-food business, you can plan accordingly by ordering earlier.

3. Leave Clear Delivery Directions

It’s crucial to make delivery as easy as possible for the drivers delivering your food. Leave clear directions during the ordering process in case the driver isn’t familiar with your neighborhood. Include cross streets or details on how to identify your home easily (e.g., “on the corner with a red door”).

Delivery preferences are important to list as well. For example, if you have children sleeping and you don’t want to wake them, leave instructions for the driver to knock instead of ringing the doorbell.

4. Prep Your House

It’s also essential to make things easy for your driver once they get to your house. Make sure there aren’t any obstacles preventing them from coming to the door (like pets, snow, trash, or other debris) and that the outside of your house is adequately lighted and easy to see. This helps the drivers find the correct address and make it to your front door quickly.

Drivers also want to feel safe when delivering, so proper lighting will ensure they know where to go and can see who is answering the door.

5. Always Tip

What is the cheapest food delivery app? | UpMenu Blog

Most delivery drivers rely on tips to ensure they are making a decent hourly wage. Most food delivery services and apps allow you to tip when ordering or online after the order is completed. Drivers will also happily take cash, as this is instant payment, instead of waiting to be paid by the ordering service. According to Glamour Magazine, tipping 15-20% is standard for large food orders, such as several pizzas or bags of food for multiple people. It’s also polite to tip more if it takes more effort than normal to complete a delivery, such as during severe weather. For smaller orders, such as dinner for one or two people, Glamour says $2-4 is a good range.

Following these tips will help you do your part as a food delivery consumer. Being more aware of what to tip, how others can navigate to your home, and when you should order food online can help you have a better overall experience with your delivered meals.

If you are finding a portion of good food to order online you can contact us for more information and we’re happy to serve you.

10 USEFUL GRILLING TIPS

Spatchcocked Chicken with Sweet & Spicy BBQ Rub Recipe | EatingWell

I often say the heart of grilling lies in grilling techniques. What separates the master grillers from the masses is that the experts understand how to manage their grill.

Sure, recipes are important, but techniques matter most. Thus, here are the 10 essentials for better grilling. Follow these tips and you will become a true BBQ master.

7 Top Tips To Grill Like A Pro - Farmers' Almanac

1. PREHEAT THE GRILL

  • Preheat your grill with the lid closed for 10 to 15 minutes.
  • With all the coals glowing red, or all the gas burners on high, the temperature under the lid should reach 500F.
  • The heat loosens any bits and pieces of food hanging onto the grate, making it easy to brush them off.
  • Preheating your grill also helps prevent food from sticking to the grate, and gets the grate hot enough to sear properly.

2. KEEP YOUR GRILL CLEAN

  • When bits of food have stuck to your cooking grate, and the grate is hot, clean it with a stainless steel brush. This step is not only for cleanliness. It also prevents your food from sticking.
  • Note: Replace brush if any loose bristles are found on cooking grates or brush.

3. KEEP THE GRILL LID DOWN

Here are 4 important reasons why your grill lid should be closed as much as possible.
1. It keeps the grates hot enough to sear the food.
2. It speeds up the cooking time and prevents the food from drying out.
3. It traps the smokiness that develops when fat and juices vaporize in the grill.
4. It prevents flare-ups by limiting oxygen.

5. GRILLING TIME AND TEMPERATURE

  • By monitoring your time and grilling temperature you avoid overcooking your food.
  • Use a timer!
  • If you are grilling in a colder climate or in a higher altitude, the cooking times will be longer. If the wind is blowing hard, it will lower a gas grill’s temperature and raise a charcoal grill’s temperature.

6. DIRECT VS. INDIRECT HEAT GRILLING

  • Direct heat (when the fire is directly below the food) is best for relatively small, tender pieces of food that cook in 20 minutes or less.
  • Indirect heat (when the fire is on either side of the food) is best for larger, tougher cuts of meat that require more than 20 minutes of cooking.

7. MAINTAINING GRILL TEMPERATURES

  • Our grills are designed to give you complete control over the heat inside of the grill.  By having consistent, reliable heat source and proper venting, the grill can maintain low or high temperatures effectively.
  • The dampers on the top and bottom of the grill control the airflow inside the grill. The more air flowing into the grill, the hotter the fire will grow and the more frequently you will have to replenish it. To slow the rate of your fuel burning, close the top vent as much as halfway and keep the lid on as much as possible. The bottom vent should be left open whenever you are grilling so you don’t kill your fire.
  • Under normal circumstances, a typical charcoal briquette fire will lose about 100˚F of heat over 40 to 60 minutes. A typical lump charcoal fire will lose heat even faster.
  • Gas grills have individual control knobs so that you can easily regulate the heat and create different grilling zones easily. You can easily maintain heat levels as low as 200˚F to over 550˚F easily and shift from direct to indirect in minutes.

8. TAME THE FLAME

  • Too many flare-ups can burn your food. Keep the lid on as much as possible. This limits the amount of oxygen inside the grill, which will help extinguish any flare-ups.
  • If the flames are getting out of control, move the food over indirect heat temporarily, until they die down. Then move the food back.

9. CARAMELIZATION IS KEY

  • One of biggest reasons for the popularity of grilled food is its seared taste.
  • To develop this taste for maximum effect, use the right level of heat and resist the temptation to turn food often. Your patience will allow for caramelization, or browning. That creates literally hundreds of flavors and aromas.
  • As a general rule, turn food only once.

10. LIGHTER FLUID: NO WAY!

  • It’s a liquid product that evaporates. Who wants that, and its foul chemical fumes under their food?
  • Chimney starters and lighter cubes are much cleaner and much more effective.

Grilling expert: You can avoid 'most of your problems' by following one  simple rule | WGNO.com

Health Benefits of Eating Italian Food | Pinocchio’s CO

Italian food is an integral part of the Mediterranean diet and provides an excellent part of a balanced, healthy diet.

Eating a balanced diet is an essential part of good nutrition, improved overall health, and a lowered risk of chronic disease. Italian food is an integral part of the Mediterranean diet — which focuses on fresh vegetables, olive oil, and grains — is an excellent part of a balanced, healthy diet. Eating Italian food offers many health benefits for you and your family!


Manage Your Weight


The best Italian food is made from fresh vegetables, including tomatoes, leafy greens, and onions, that are low in calories but high in nutritional value. These reduced-calorie ingredients can help you increase your intake of vitamins while achieving or maintaining your ideal weight!


Increased Fiber


Fiber-rich foods, such as vegetables and grains, are important staples to the Italian menu! Getting the right intake of your daily recommended fiber help to regulate your digestive system, stabilize blood sugar levels, and lower blood cholesterol.


Healthy Heart


Olive oil is a monounsaturated fat rich in omega fatty acids. This healthy form of oil is full of antioxidants and is used in the most authentic Italian meals! Olive oil helps to reduce inflammation, protect your heart, and fight disease.


Fighting Power


Italian food is packed with ingredients that offer powerful antioxidants such as vitamins A, C, and E. Like olive oil, Italian meal ingredients such as vegetables, grains, and nuts, and fruits provide the benefit of antioxidants – and flavor! A glass of red wine also offers antioxidants, which protect the body from unstable molecules that can cause cell damage.


Long-life Longevity


Italian food uses fresh, natural ingredients and the healthiest of fats, both of which have been found to be associated with lower levels of cancer, heart disease, inflammatory disease, and more. Improving the longevity of life might be a natural benefit of enjoying an Italian meal!


Great Garlic


Did you know that garlic, whether crushed or chopped, offers antibiotic and antifungal properties? Garlic is a key ingredient in the finest Italian foods and has been shown that it may lower the risk of breast, colon, stomach, and throat cancers. Also, garlic has been shown to offer heart protection properties!


Power-packed Protein


Most Italian dishes use the healthier, white meats and fish. Both are excellent sources of protein and lower in fat than red meats. Fish also offers essential fatty acids and minerals, which are necessary for overall well-being. White meats, such as chicken, serve up protein, vitamins, and minerals in every portion!


Sharing Meals


One of the most pleasurable parts of Italian dining is the love that goes into making each dish and the chance to share meals with others! Food is not only about sustenance to maintain health but is an opportunity to be social with others, laugh, and live a life that celebrates family, friends, and health!


At Pinocchio’s Italian Eatery in Brighton, CO, we serve up the freshest of Italian food every day! Call us at (303) 655-7777 to make a reservation or

stop by to enjoy our homemade food and toast your health!